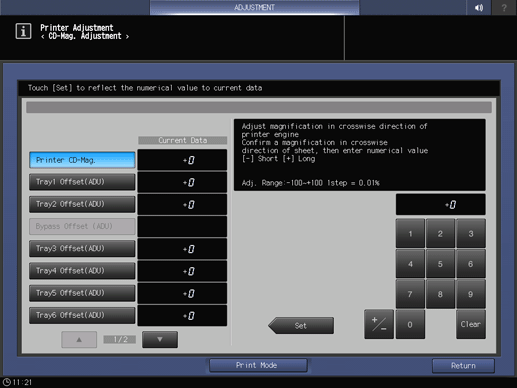
[CD-Mag. Adjustment]
Overview
Adjust the printing magnification in the crosswise direction when printing.
You can adjust so that the test pattern of a chart is output with the correct magnification.
Specifications
Category | Adjustment / Maintenance | ||
Location | Machine | Touch Panel, Control Panel | |
Printer driver | - | ||
Application | - | ||
Required options | - | ||
Required items | - | ||
Setting items | Adjustment target selection key | Select the adjustment target. | |
[+] / [,] | Switches the adjustment target page. | ||
Keypad | Used to enter numeric values. | ||
[Clear] | Returns the entered numeric value to "0". | ||
[Set] | Sets the numeric value entered using the on-screen keypad or the Keypad of the Control panel to the selected setting item. | ||
Remarks | - | ||
Reference | - | ||
Screen access | Touch panel - [MACHINE] - [Adjustment] - [Machine Adjustment] - [Printer Adjustment] - [CD-Mag. Adjustment] | ||
Control panel - Utility/Counter - [Administrator Setting] - [System Setting] - [Expert Adjustment] - [Printer Adjustment] - [CD-Mag. Adjustment] | |||
Procedure (When Adjusting the Front Side)


A chart is output.
For details about the  mark that is printed on the front side of the chart, refer to About Charts.

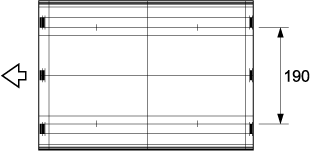
Standard value: ^ 0.5% or less, within 1 mm for 190 mm

Use [+ / -] to select the plus or minus of the numeric value. To change [Current Data], press [Set].
[Adj. Range:-100~+100 1step = 0.01%]
Procedure (When Adjusting the Back Side)

Example: For Tray 1, press [Tray1 Offset(ADU)].

A chart is output.
The side that does not have the  mark is the back side.

Standard value: ^ 0.5% or less, within 1 mm for 190 mm

Use [+ / -] to select the plus or minus of the numeric value. To change [Current Data], press [Set].
[Adj. Range:-100~+100 1step = 0.01%]
 in the upper-right of a page, it turns into
  and is registered as a bookmark.