
Checking Automatic Inspection Levels
Overview
Check the level of stains on the image that are detected during automatic inspections, and adjust as necessary.
Use the 2 types of test chart to check the automatic inspection level for [Stain]. During actual automatic inspections, the appearance of the spots (size and density) may differ depending on the paper or image, so be sure to use the test charts when checking or adjusting the automatic inspection level.
There are no test charts for checking the inspection levels for [Streak] and [Spot].
- Reference chart
- Inspection chart
Reference charts:
Test charts for creating reference images for checking the inspection level. There are no dots on reference charts for indicating the stain level.
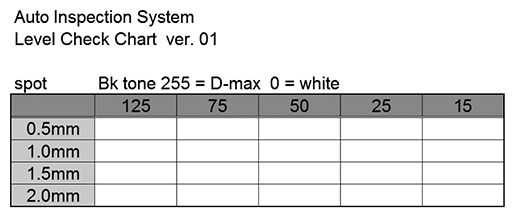
Inspection charts:
Charts for checking whether the automatic inspection was performed at the set level. There are dots on inspection charts for indicating the stain level.
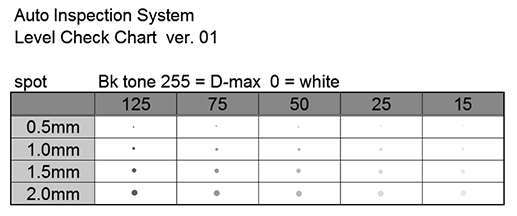
- For details about how to acquire automatic inspection test charts, contact your service representative.
Check Procedure
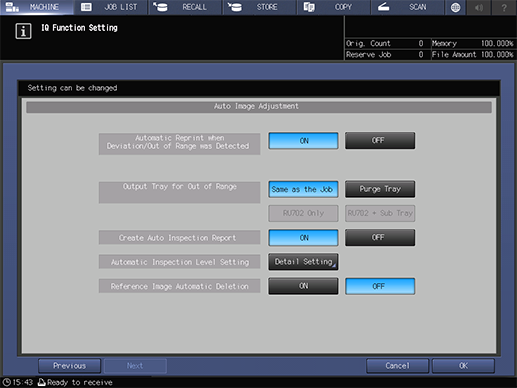
For details about the settings, refer to Configuring Advanced Automatic Inspection Settings in Advance. In this section, the following settings are used as an example.
Item | Setting Value |
|---|---|
[Automatic Reprint when Deviation/Out of Range was Detected] | [OFF] |
[Output Tray for Out of Range] | [Same as the Job] |
[Create Auto Inspection Report] | [ON] |

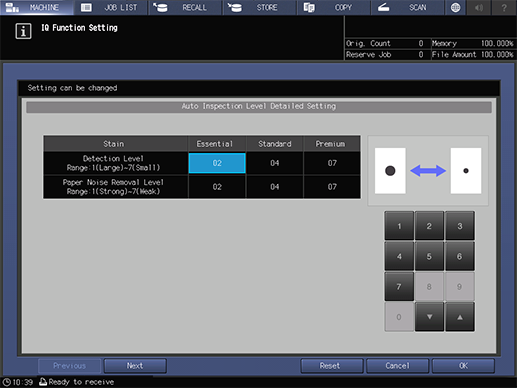
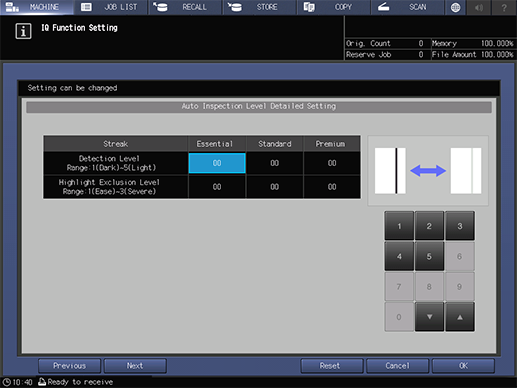
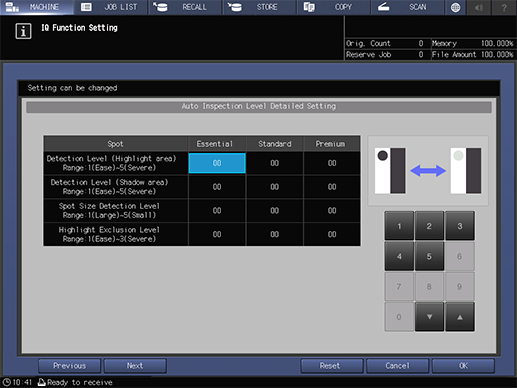
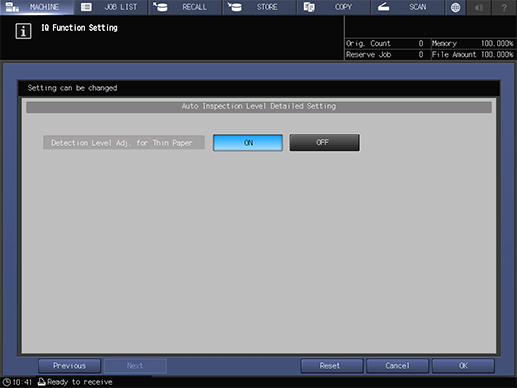
The [Auto Inspection Level Detailed Setting] screen is displayed.
Inspections for [Streak] (streak-like dirt) and [Spot] (spot-like dirt), and [Detection Level Adj. for Thin Paper] are optional functions. These are not displayed under default settings. To use this setting, please contact your service representative.


Here, change each setting for [Standard] to the value at which you want to confirm the inspection level.
Set [Detection Level Adj. for Thin Paper] to [ON].
For details about how to configure the settings, refer to the procedure detailed in [Automatic Inspection Level Setting].
Perform Steps 1 to 6 on Creating New Reference Images and Performing Automatic Inspections to create reference images.
[Stain]: Use the reference chart to create a reference image.
[Streak] or [Spot]: There is no reference chart. Create a reference image with the print job.
Execute the automatic inspection by following Step 7 through Step 9 detailed on Creating New Reference Images and Performing Automatic Inspections.
[Stain]: Execute the automatic inspection using the inspection chart and reference image created in Step 4.
[Streak] or [Spot]: Execute the automatic inspection with a print job using the reference image created in Step 4.
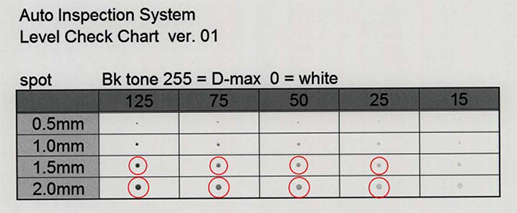
[Stain]: Check if the levels of those areas circled in red that were detected as dirt match the levels set in Step 3.
[Streak] or [Spot]: If there are any areas that have been detected, check that those sections match the levels set in Step 3 (in report images, streak-like dirt is shown as an arrow while spot-like dirt is shown as a square).
- The results of the automatic inspection may differ if there are minor changes between each print. Repeat the automatic inspection 3 to 5 times, and then make an overall judgment of the results.

- Though you can check the automatic inspection report using either the system’s Touch panel or from the browser, it is recommended to check using the browser as per data capacity limitations. For details, refer to Checking Automatic Inspection Reports Using the Browser.


 in the upper-right of a page, it turns into
  and is registered as a bookmark.