
[Density Balance Auto. Adj.] (If Scanner (Original glass) Is Present and Intelligent Quality Optimizer IQ-501 Is Not Mounted)
Overview
Automatically adjusts the density balance by outputting a density balance chart and performing color measurement with the scanner.
Procedure
1
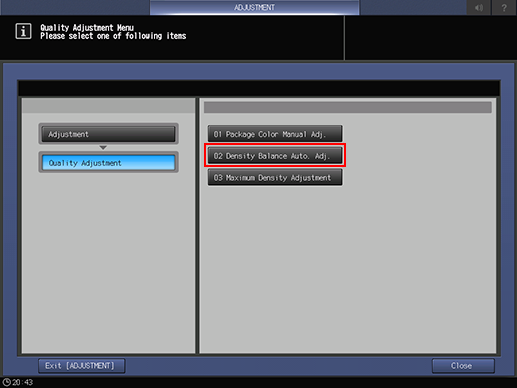
Press [Density Balance Auto. Adj.].
2
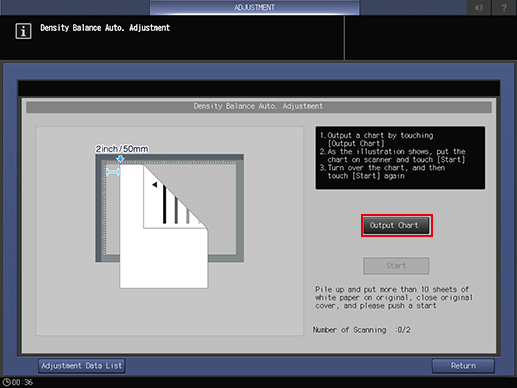
Press [Output Chart].
3

Press [Quality Adj.].
4
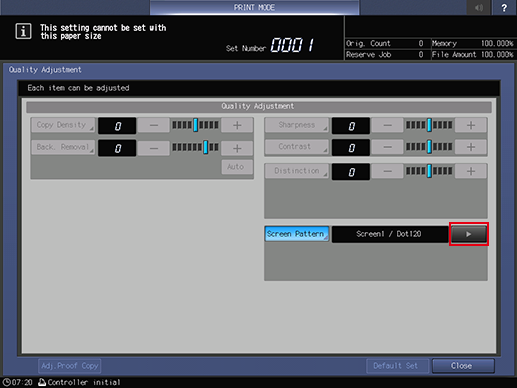
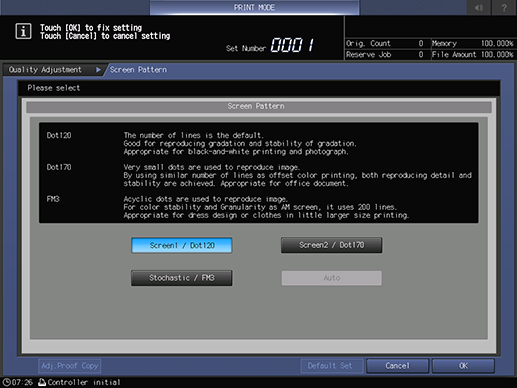
Press [Screen Pattern], and then press [)] on the right side. Select the screen you want to adjust, and return to the [PRINT MODE] screen.
You can also press [Screen Pattern] to select the screen to be adjusted.
5
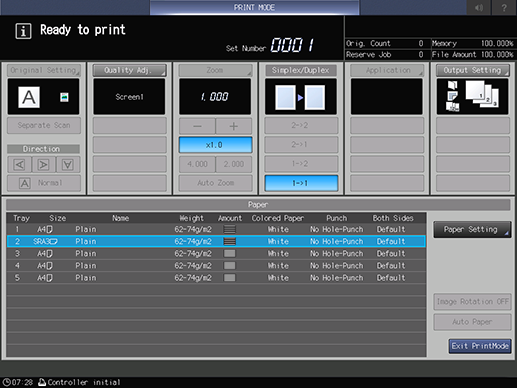
Load A3 w,11 e 17 w, 12 e 18 w, 13 e 19 w or SRA3 w paper into any paper tray and select that paper tray.
6
Press Start on the Control panel.
Charts are output, and [Density Balance Auto. Adjustment] screen is displayed.
7
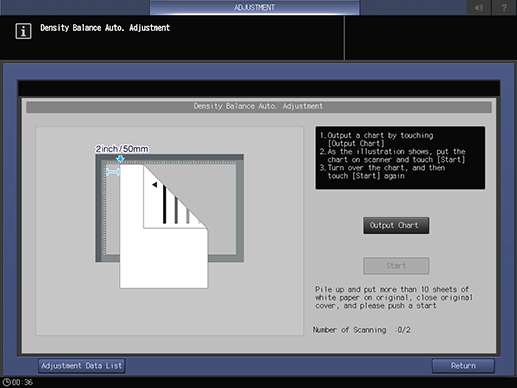
Set the output chart into Original glass as shown in the example on the screen.
Set the printed side facing down with the triangle mark on the chart towards the back.
Separate the chart 5 cm / 2" away from Vertical size guide and set it against Horizontal size guide.
Place around 10 sheets of white paper on top of the chart and close ADF.
8
Press [Start] to perform the first scan.
If an error occurs, an error message is displayed. Refer to the message displayed and take action.
9
Replace the top and bottom of the scanned chart and set it on Original glass as in step 7.
Set the printed side facing down with the triangle mark on the chart facing forwards.
10
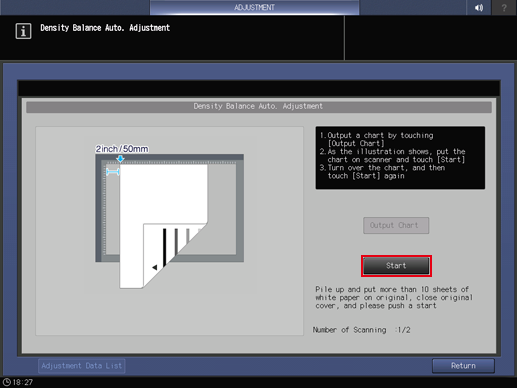
Press [Start] to perform the second scan.
Registers the density balance adjustment value.
11

If [Yes] is selected in the dialog that appears, the output screen will appear and the chart can be output.
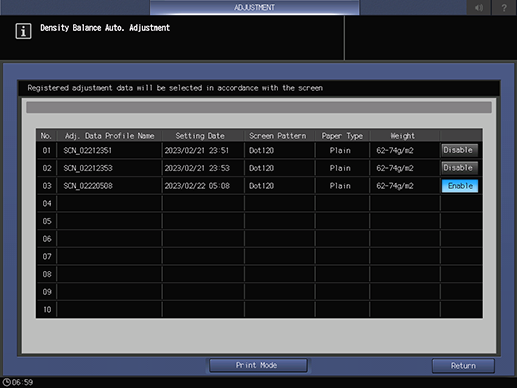
Select [No] to display the list of density balance adjustment values. Press [Return] to return to the [Density Balance Auto. Adjustment] screen.
12
Press [Exit PrintMode] to return to the [Density Balance Auto. Adjustment] screen.
13

If [Yes] was selected in Step 11 to output the chart, scan the chart following the instructions on the screen.
Displays the values before and after adjustment in a graph.
14
Press [Return].
Adjustment values are registered under the following conditions.
When there is space in the registration frame | The smallest available number is registered. |
When there is no space in the registration frame | Overwrites and registers the one that meets the following conditions. If more than one condition applies, the smallest number will be overwritten with priority. (1) Same screen + same paper type + same weight and adjustment value with an old date (2) Same screen + same paper type and adjustment value with an old date (3) Same screen and adjustment value with an old date (4) Adjustment value with oldest date However, if the adjustment value that is about to be overwritten is the only one among the registered screens, it will be registered and overwritten to the oldest dated adjustment value on another screen without overwriting. |
 in the upper-right of a page, it turns into
  and is registered as a bookmark.