
[Auto Inspection]
Overview
Automatic inspection uses sensors to automatically detect spots and stains on images produced during printing, and then rejects output paper that has problems.
This function reduces labor costs associated with making manual inspections, while also helping to improve the efficiency of the printing process.

Tips
- Textured paper, unprinted insertion paper, paper with punch holes, tab paper, and insertion paper are not subject to automatic inspections.
- You can perform inspections when using paper with the numbering and page numbers already printed on it, or when using the stamp copying function for the date and time, by specifying the areas not targeted for inspection.
- [Auto Inspection] can also be set with AccurioPro Print Manager.

Reference
- For details about the automatic inspection area, refer to Automatic Inspection Area.
Setting Items
Setting item | Description | ||
|---|---|---|---|
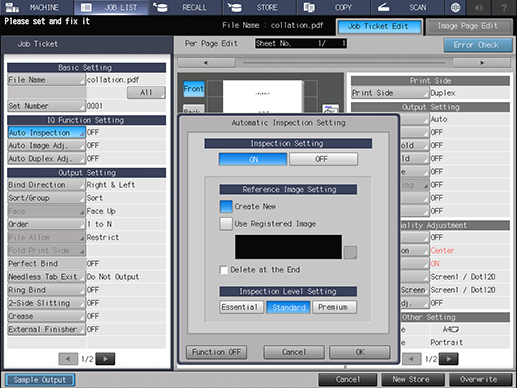
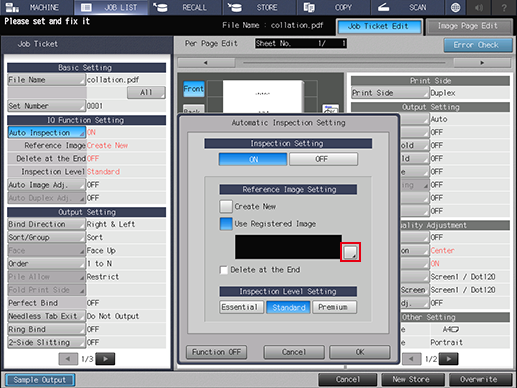
[Inspection Setting] | [ON] | Performs [Auto Inspection] while printing. | |
[OFF] | Does not perform [Auto Inspection] while printing. | ||
[Reference Image Setting] | [Create New] | Creates a new reference image. | |
[Use Registered Image] | Select a reference image from the registered images. | ||
[Delete at the End] | Select this check box to delete the reference image when printing has ended. | ||
[Inspection Level Setting] | [Essential] | Specify [Inspection Level Setting] as the output purpose. | |
[Standard] | |||
[Premium] | |||
Setting Procedure (Creating New Reference Images and Performing Automatic Inspections)
When performing a new automatic inspection, create a reference image before printing the job.
1
Set [Inspection Setting] to [ON].
2
Select the [Create New] check box in [Reference Image Setting].
3
Set each item, and press [OK].
If you want to delete a reference image when printing has ended, set the [Delete at the End].
Specify [Inspection Level Setting] as the output purpose.
4
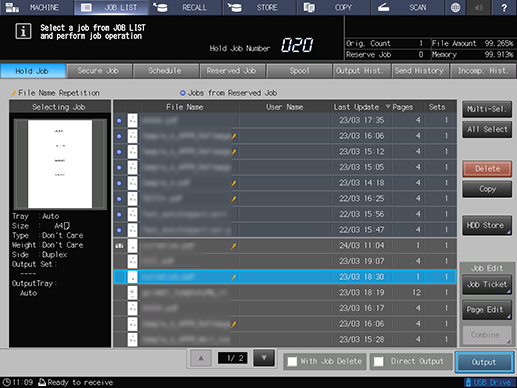
Press [New Store] or [Overwrite].
The setting is saved, and the display returns to the [Hold Job] screen or the [Secure Job] screen.
5
Press [Output].
6
Press [OK].
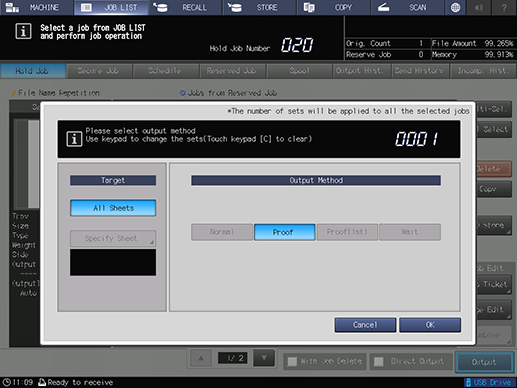
One copy is output as [Proof] to create a reference image for automatic inspection. Confirm that no errors have occurred on the output paper.
7
If the [MACHINE] tab blinks, press [MACHINE].
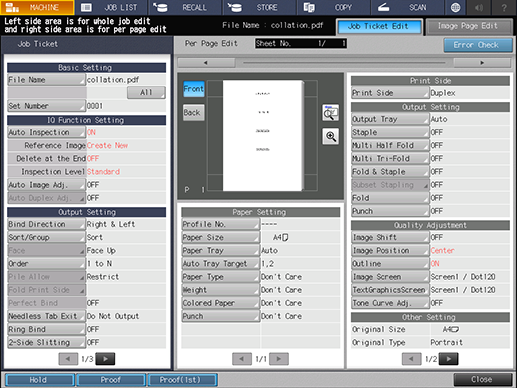
The [Job Ticket Edit] screen is displayed.
Press [Hold], [Proof], or [Proof(1st)] as needed.
Press [Hold] to register a reference image with the created image and close the [Job Ticket Edit] screen.
Press [Proof] to output a reference image again. After the reference image is output, the [Job Ticket Edit] screen is displayed.
Press [Proof(1st)] to output only the first page of reference images as a proof.
8
Press Start on the Control Panel.
The print job begins, followed by the automatic inspection.
Tips
- If an abnormality is detected during the inspection, it is displayed in [IQ Detected Result]. [AutoInspect.Report] can be confirmed with this system or Web Utilities of Auto Inspection Unit UK-301.
- If you want to set the automatic inspection area, we recommend that you create a reference image with [Sample Output]. After that, carry out the automatic inspection according to Setting Procedure (Selecting Pre-created Reference Images and Performing Automatic Inspections).
Setting Procedure (Selecting Pre-created Reference Images and Performing Automatic Inspections)
When using reference images that have already been created to perform automatic inspections, select the image from the list and print the job.
1
Set [Inspection Setting] to [ON].
2
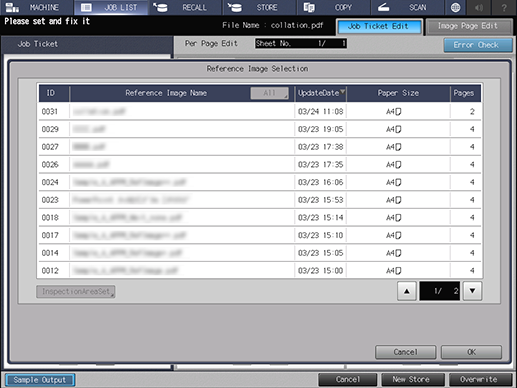
Select [Use Registered Image] in [Reference Image Setting], and press the white button on the lower-right side.
The [Reference Image Selection] screen is displayed.
3
Select the desired reference image, and press [OK].
4
Set each item, and press [OK] to apply the setting.
If you want to delete a reference image when printing has ended, set the [Delete at the End].
Specify [Inspection Level Setting] as the output purpose.
5
Press [New Store] or [Overwrite].
The setting is saved, and the display returns to the [Hold Job] screen or the [Secure Job] screen.
6
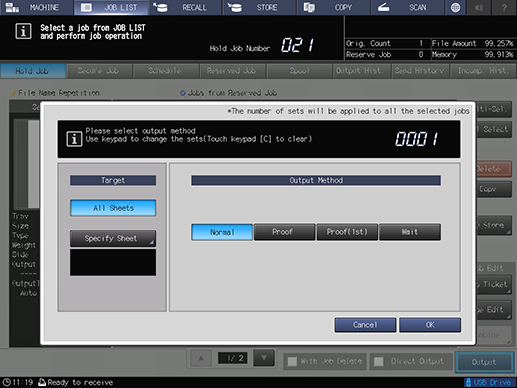
Press [Output].
7
Select [Normal] in [Output Method].
8
Press [OK].
The print job begins, followed by the automatic inspection. If an abnormality is detected during the inspection, it is displayed in [IQ Detected Result]. [AutoInspect.Report] can be confirmed with this system or Web Utilities of Auto Inspection Unit UK-301.
Tips
- Press Stop on the Control panel during printing to display [Change Level], enabling you to change the inspection level.
 in the upper-right of a page, it turns into
  and is registered as a bookmark.