
Creating New Reference Images and Performing Automatic Inspections
Overview
When performing a new automatic inspection, create a reference image before printing the job.

Tips
- Textured paper, unprinted insertion paper, paper with punch holes, tab paper, and insertion paper are not subject to automatic inspections.
- You can perform inspections when using paper with the numbering and page numbers already printed on it, or when using the stamp copying function for the date and time, by specifying the areas not targeted for inspection. For details, refer to Automatic Inspection Area.
- When setting up the printer driver, make sure you check that none of the previous settings are left in any of the item tabs. If any of the previous settings do remain, make sure you clear them.
Assumed Operating Environment
Item Name | Contents |
|---|---|
Application | Adobe Acrobat Reader DC |
Printer Driver | PS Plug-in Driver |
Setting Procedure
This section describes the procedure for holding a job using the PS Plug-in Driver and configuring the settings using AccurioPro Print Manager.
1
Open the original in the application, and click [Print] in the [File] menu.
2
Select the printer to use for printing, and click [Properties].
3
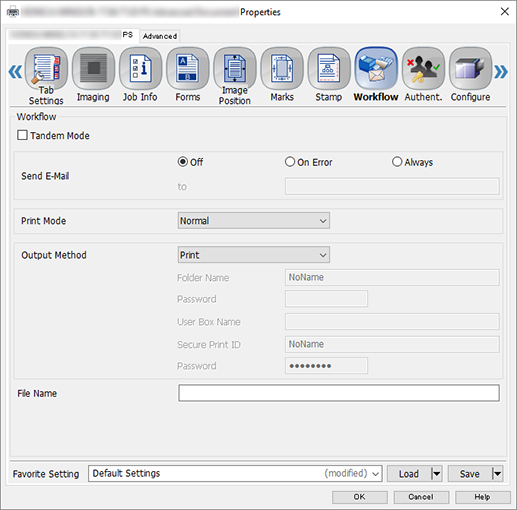
Select the [Workflow] tab, and then [Hold] for [Output Method].
4
Click [OK].
5
Select a [Hold] job list in AccurioPro Print Manager.
For details about how to access AccurioPro Print Manager, refer to AccurioPro Print Manager.
6
Select a held print job, and then press [Job Management] followed by [Job Settings...].
7
Enable [Auto Inspection] from the [Quality] tab.
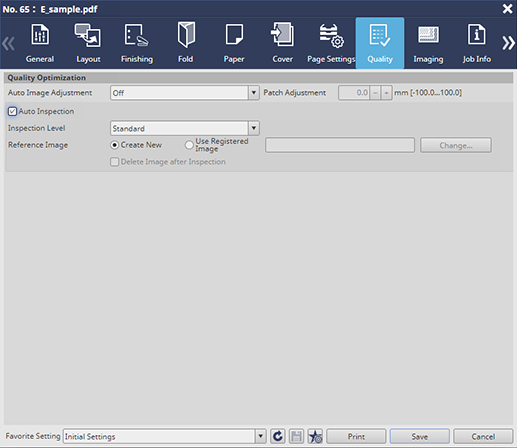
8
Select [Create New] of [Reference Image].
The file name of the reference image to be registered has the same file name as the original.
Tips
If automatic inspection is to be performed as is with a job used to register reference images, the following items should also be set.
- [Delete Image after Inspection]: Set when deleting reference image at the end of an automatic inspection job
- [Inspection Level]: Set according to the purpose of the output
9
Press [Print] to create the reference image.
1 copy will be printed as proof and the one scanned at Intelligent Quality Optimizer IQ-501 will be registered as the reference image.
10
When the printing is complete, the [MACHINE] tab on the Touch panel flashes and the [Job Ticket Edit] screen is displayed.

Check for any abnormalities in the output paper that was output as the reference image.
11
On the [Job Ticket Edit] screen, operate according to the situation.
If there is no problem with the reference image and you wish to perform automatic inspection as is: press Start of Control panel. The reference image is registered and automatic inspection is performed.
If there is no problem with the reference image and you want to finish the job as is: press [Hold]. The [Job Ticket Edit] screen closes and the reference image is registered. If you would like to continue to conduct automated inspections from AccurioPro Print Manager, refer to Selecting Pre-Created Reference Images and Performing Automatic Inspections.
If there is a problem with the reference image and you want to create the reference image again: press [Proof]. Printing starts again and the reference image is recreated. When printing is completed, the [Job Ticket Edit] screen is displayed.
To cancel the job without registering the reference image: press [Close] and close the [Job Ticket Edit] screen. Press Stop on Control panel to abort the job.
Tips
- The printed data is also registered and displayed as a reference image on the [MACHINE], [Ref. Image Manage.], and [Reference Image List 1] options on the Touch panel. For details, refer to [Ref. Image Manage.].
- If an abnormality is detected during the inspection, it is displayed on the [MACHINE] and [IQ Detected Result] screens on the system’s Touch panel. For details, refer to [IQ Detected Result].
- You can check the automatic inspection reports using the system’s Touch panel or from Web Utilities on Auto Inspection Unit UK-301.

Reference
- For details about automatic inspection reports, refer to Automatic Inspection Reports.
 in the upper-right of a page, it turns into
  and is registered as a bookmark.