
Stapling
What Is Stapling?
Allows you to print the original onto both sides of the paper, and then staple the document.
This section introduces the 2 settings procedures detailed below.
1. Print onto paper that is the same size as the original size
2. Reduce the size of the paper same as original, perform a 2 in 1 imposition, and print
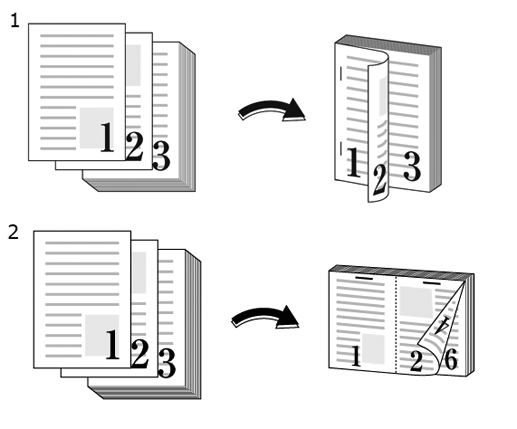
The following is recommended
Use staple printing in such circumstances.
When you want to print the original with a booklet-like finish
When you want to bundle together a high number of documents
Target Jobs
Does not depend on the file format.
Target Tools
Touch panel (machine store jobs) | Printer Driver | AccurioPro Print Manager | Machine Hot Folder | AccurioPro Hot Folder |
|---|---|---|---|---|
- | . | . | . | . |
Assumed Operating Environment
Item Name | Contents |
|---|---|
OS | Windows 10 |
Application | Adobe Acrobat Reader DC |
Printer Driver | PS Plug-in Driver |
Option | Finisher For details about the Finisher, refer to the "Name and Specifications of Each Component in Paper Output Options" of [Specifications]. |

NOTICE
- The actual screen displayed may differ depending on the application version or revision, and the environment you are using.

Tips
- When setting up the printer driver, make sure you check that none of the previous settings are left in any of the item tabs. If any of the previous settings do remain, make sure you clear them.
Procedure for Staple Printing (Full Size + 2-Sided + Stapled)
This section describes the procedure for performing 2-sided printing of a 1-sided A4-sized original and stapling it using the PS Plug-in Driver.
1
Open the original in the application, and click [Print] in the [File] menu.
2
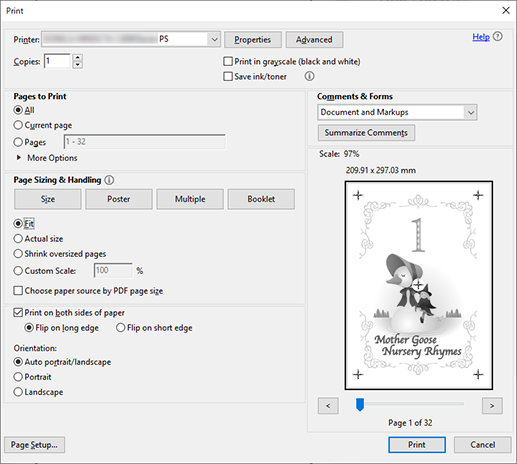
Select the printer to use for printing, and click [Properties].
3
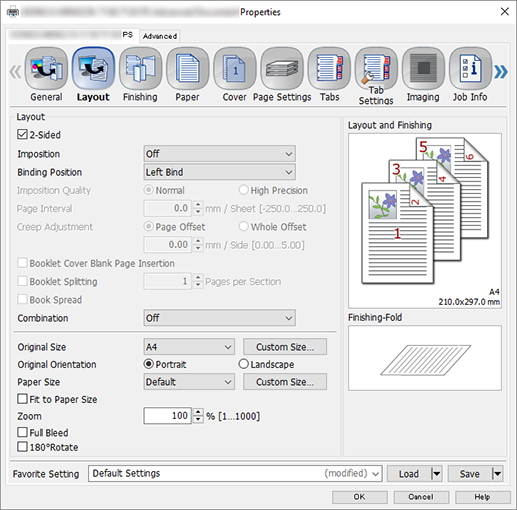
Select the [Layout] tab, and configure the items.
For details about the settings, refer to the [Layout] tab settings (described after the procedure).
4
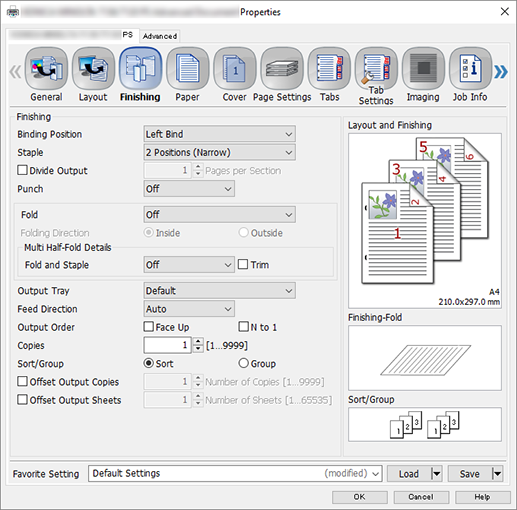
Select the [Finishing] tab, and configure the items.
For details about the settings, refer to the [Finishing] tab settings (described after the procedure).
5
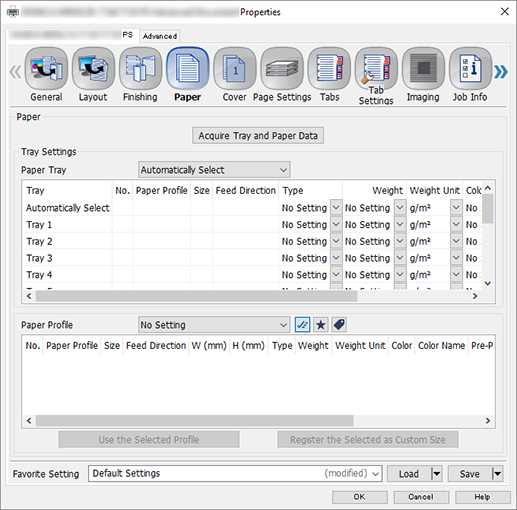
Select the [Paper] tab, and click [Acquire Tray and Paper Data].
"
 " is displayed if tray / paper information is successfully obtained.
"
 " is displayed if you were unable to acquire tray / paper information. Check to see if parts such as the optional paper feed tray are mounted properly.
6
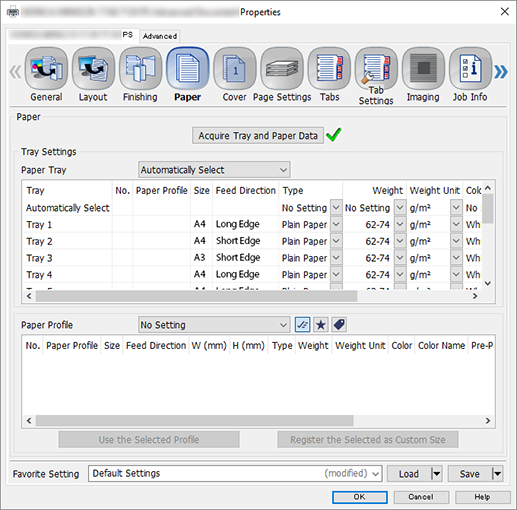
For [Paper Tray], select a paper feed tray in which A4 paper (long edge) has been loaded, and click [OK].
7
Enter the [Copies] you want to print on the [Print] screen.
8
Click [Print].
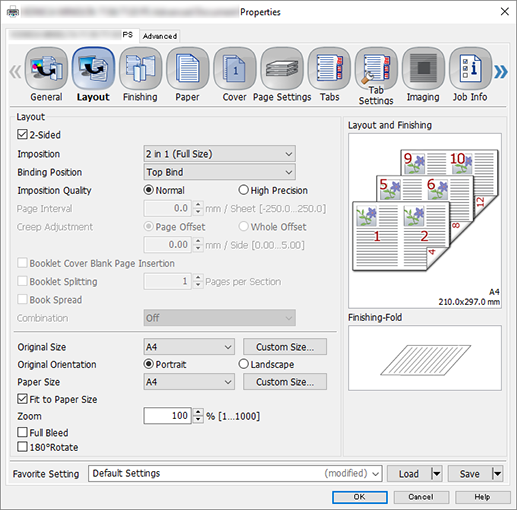
[Layout] tab settings
Item | Setting Value |
|---|---|
[2-Sided] | Add check mark |
[Binding Position] | [Left Bind] |
[Original Size] | [A4] |
[Original Orientation] | [Portrait] |
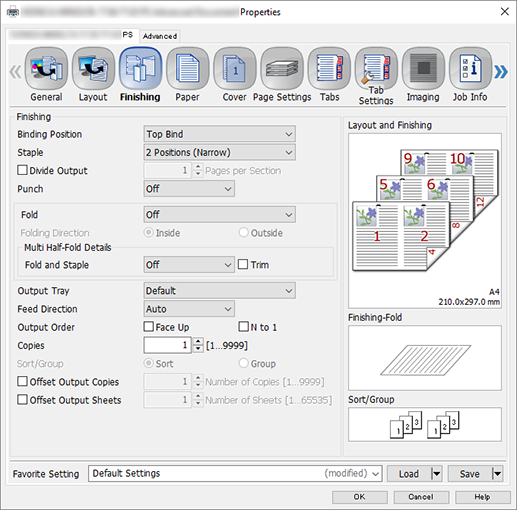
[Finishing] tab settings
Item | Setting Value |
|---|---|
[Staple] | Select any of the following
|
Procedure for Staple Printing (2 in 1 + 2-Sided + Stapled)
This section describes the procedure for reducing 1-sided A4-sized originals (PDF) to A4 size paper, performing 2-sided imposition, performing 2-sided printing and stapling it using the PS Plug-in Driver.
1
Open the original in the application, and click [Print] in the [File] menu.
2
Select the printer to use for printing, and click [Properties].
3
Select the [Layout] tab, and configure the items.
For details about the settings, refer to the [Layout] tab settings (described after the procedure).
4
Select the [Finishing] tab, and configure the items.
For details about the settings, refer to the [Finishing] tab settings (described after the procedure).
5
Select the [Paper] tab, and click [Acquire Tray and Paper Data].
"
" is displayed if tray / paper information is successfully obtained."
" is displayed if you were unable to acquire tray / paper information. Check to see if parts such as the optional paper feed tray are mounted properly.
6
For [Paper Tray], select a paper feed tray in which A4 paper (long edge) has been loaded, and click [OK].
7
Enter the [Copies] you want to print on the [Print] screen.
8
Click [Print].
[Layout] tab settings
Item | Setting Value |
|---|---|
[2-Sided] | Add check mark |
[Imposition] | [2 in 1 (Full Size)] |
[Binding Position] | [Top Bind] |
[Original Size] | [A4] |
[Original Orientation] | [Portrait] |
[Paper Size] | [A4] |
[Fit to Paper Size] | Add check mark |
[Finishing] tab settings
Item | Setting Value |
|---|---|
[Staple] | Select any of the following
|
 in the upper-right of a page, it turns into
  and is registered as a bookmark.