Home >
Adjustment > [Machine Adjustment] > [Printer Adjustment] > [FD-Mag. Adjustment]
[FD-Mag. Adjustment]
Overview
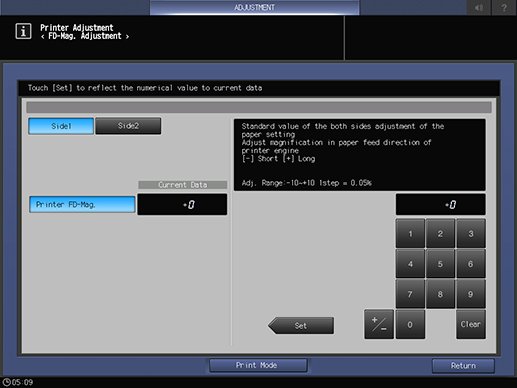
Adjust the printing magnification in the paper feed direction when printing.
You can adjust so that the test pattern of a chart is output with the correct magnification.
- For details about the
 mark that is printed on the front side of the chart, refer to About Charts.
Setting Procedure (When Adjusting the Front Side)
4
Load A3 w or 11 e 17 w paper into any paper tray, and select that paper tray.
5
Press Start on the Control panel.
A chart is output.
6
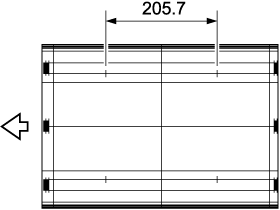
Measure the magnification in the paper feed direction using the scale.
7
If any adjustments are required, press [Exit PrintMode] to return to the setting screen.
8
Use the on-screen keypad or the Keypad of the Control panel to enter the numeric value.
Use [+ / -] to select the plus or minus of the numeric value. To change [Current Data], press [Set].
[Adj. Range:-10~+10 1step = 0.05%]
9
Repeat steps 2 to 8 until the desired result is obtained.
Setting Procedure (When Adjusting the Back Side)
2
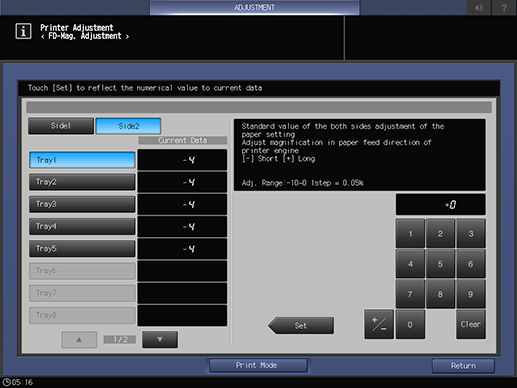
Press the adjustment target selection key to adjust.
5
Load A3 w or 11 e 17 w paper in the paper tray for adjustment selected in step 1, and select that paper tray.
6
Press Start on the Control panel.
A chart is output.
7
Measure the magnification of the paper feed direction of the back side using the scale.
The side that does not have the  mark is the back side.
Standard value: ^ 0.5% or less (when full size), within 205.7 mm ^ 1 mm
8
If any adjustments are required, press [Exit PrintMode] to return to the setting screen.
9
Use the on-screen keypad or the Keypad of the Control panel to enter the numeric value.
Use [+ / -] to select the plus or minus of the numeric value. To change [Current Data], press [Set].
[Adj. Range:-10~0 1step = 0.05%]
10
Repeat steps 3 to 9 until the desired result is obtained.

 mark that is printed on the front side of the chart, refer to About Charts.


 mark is the back side.

 in the upper-right of a page, it turns into
  and is registered as a bookmark.