
[Common Setting]
Overview
Set the common items in [User Setting] and [Administrator Setting].
You can change the message display time and other settings on the Touch panel. You can carry out your work more efficiently by changing the setting according to the purpose of use.
Setting Items
Screen access
Control panel - Utility/Counter - [User Setting] - [Common Setting]
Setting item | Description | |
|---|---|---|
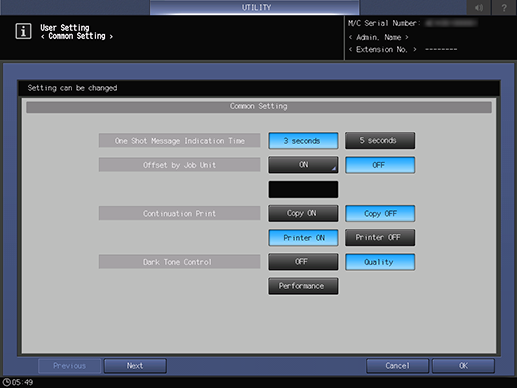
[One Shot Message Indication Time] | Select the display time of the message that is displayed momentarily in the message display area on the Touch panel. | |
[Offset by Job Unit] | Configure the setting to perform output offset every specified number of jobs. Using this function facilitates offset for each job. Range: 1 to 9999 | |
[Continuation Print] | Set whether or not to output successive copy jobs or print jobs continuously without stopping the machine at each job break. | |
[Dark Tone Control] | [OFF] | Does not set [Dark Tone Control]. |
[Quality] | Automatically slows down the copy speed to stabilize the output image. | |
[Performance] | Prioritizes the copy speed. | |
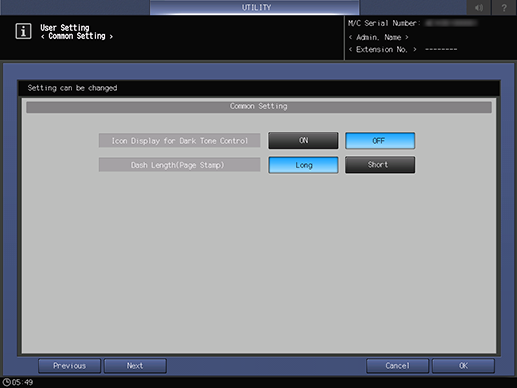
[Icon Display for Dark Tone Control] | Set whether to display the icon when [Dark Tone Control] is functioning. This item is available when [Quality] or [Performance] is selected in [Dark Tone Control]. | |
[Dash Length(Page Stamp)] | Set the length of the bar symbol, "dash", that is used in page stamps. * For print jobs, the settings may not work depending on the type of the Image Controller mounted on the machine. | |
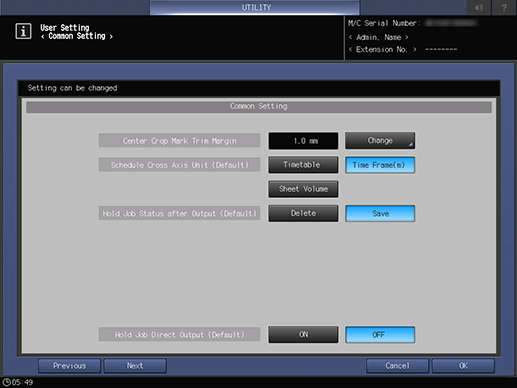
[Center Crop Mark Trim Margin] | Set the interval to be added to the interval between the center crop mark and the original image area. Range: 0.0 mm to 20.0 mm | |
[Schedule Cross Axis Unit (Default)] | Select the horizontal axis unit of the [Schedule] screen of [JOB LIST]. | |
[Hold Job Status after Output (Default)] | Set the default for automatically deleting hold jobs after printing. The setting can be changed in [With Job Delete] when printing. | |
[Hold Job Direct Output (Default)] | Set the default of the [Direct Output] check box at the bottom of the [Hold Job] screen. The setting can be changed in [Hold Job]. * After changing the setting, turn off Sub power switch once before using this system. | |
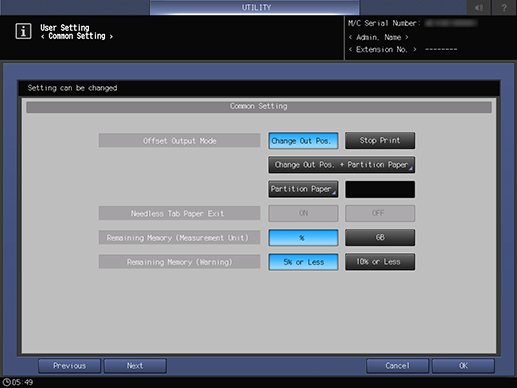
[Offset Output Mode] | [Change Out Pos.] | Switches the paper output position on the output tray. |
[Stop Print] | Stops printing. To continue printing, press Start. | |
[Change Out Pos. + Partition Paper] | Switches the paper output position on the output tray, and inserts partition paper. When setting this item, you need to select the paper tray loaded with partition paper. | |
[Partition Paper] | Inserts partition paper. When setting this item, you need to select the paper tray loaded with partition paper. | |
[Tab Ejection] | Set whether or not to automatically output unnecessary tab paper loaded in the paper tray that is used for a job. | |
[Remaining Memory (Measurement Unit)] | Set the display unit of the remaining memory. | |
[Remaining Memory (Warning)] | Set a reference value to display a warning when the remaining amount of available memory in the HDD is low. | |
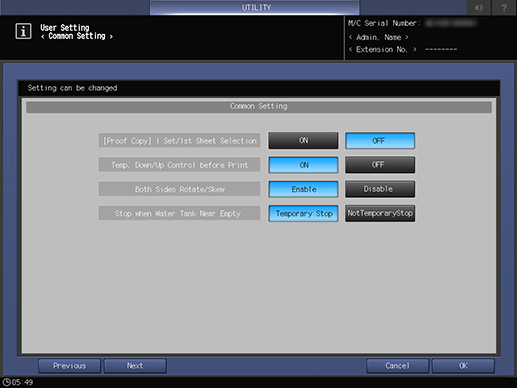
[[Proof Copy] 1 Set/1st Sheet Selection] | Make settings to display the selection screen of Proof Copy that checks the finish by copying a small amount in advance. | |
[Temp. Down/Up Control before Print] | Set whether to adjust to the appropriate temperature by rotating the fusing roller before output. | |
[Both Sides Rotate/Skew] | Set whether or not to use the [Rotate/Skew] function of [Both Sides]. | |
[Stop when Water Tank Near Empty] | Set whether or not to temporarily stop printing when the water in the humidification tank runs low. This is displayed when Relay Unit RU-518m with Humidifier HM-103 is mounted. | |
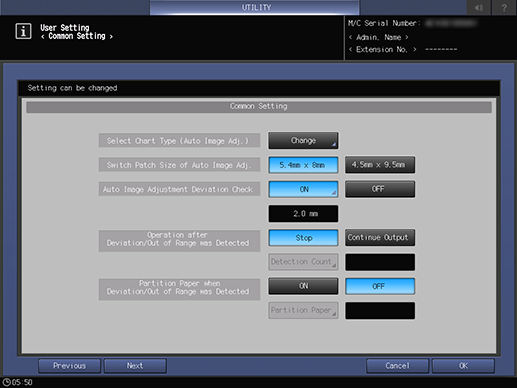
[Select Chart Type (Auto Image Adj.)]*1 | Select the chart type when automatically adjusting the image quality for each paper weight. | |
[Switch Patch Size of Auto Image Adj.]*1 | Set the patch size that is printed on a chart for automatic image adjustment. | |
[Auto Image Adjustment Deviation Check]*1 | Set whether or not to automatically check a deviation. Range: 0.5 mm to 10.0 mm | |
[Operation after Deviation/Out of Range was Detected]*1 | [Stop] | Stops printing when a deviation or non-standard image is detected. |
[Continue Output] | Continues printing even if a deviation or non-standard image is detected. | |
[Detection Count] | Sets the number of deviations or non-standard images detected before printing is stopped while [Continue Output] is selected. Range: 0 to 10 | |
[Partition Paper when Deviation/Out of Range was Detected]*1 | Configure the setting to insert partition paper when output paper does not satisfy the standard. [Partition Paper]: Sets the paper tray to load partition paper into. | |
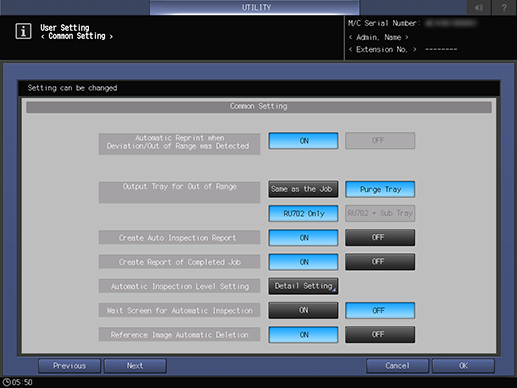
[Automatic Reprint when Deviation/Out of Range was Detected]*1 | Configure the setting to re-print a job when output paper does not satisfy the standard. When re-printing, paper in this system is output once, so no page order error occurs on output paper. | |
[Output Tray for Out of Range]*2*3 | [Same as the Job] | Ejects paper to the same output tray as a job when output paper does not satisfy the standard. |
[Purge Tray] | Ejects paper to Purge tray when output paper does not satisfy the standard. | |
[RU702 Only] | Ejects paper only to the Purge tray of Relay Unit RU-702 when output paper does not satisfy the standard. This setting is available when [Purge Tray] is selected. | |
[RU702 + Sub Tray] | Ejects paper to the Purge tray of Relay Unit RU-702 and Secondary (sub) tray of another unit when output paper does not satisfy the standard. This setting is available when [Purge Tray] is selected. * If the available Secondary (sub) tray is not provided in Relay Unit RU-702 or later inactive. | |
[Create Auto Inspection Report]*2 | Configure the setting to create an automatic inspection result report. If output paper that does not satisfy the standard is not ejected automatically, the user processes non-standard output paper based on the report. | |
[Create Report of Completed Job]*2 | Configure the setting to create an automatic inspection report within the standard. You can create an inspection result report for the output paper with the standard satisfied. | |
[Automatic Inspection Level Setting]*2 | Press [Detail Setting] to set the inspection standard for automatic inspection. You can change the inspection level according to the type of stain or output-related issue. | |
[Wait Screen for Automatic Inspection]*2 | Sets an automatic inspection area on the wait screen. When outputting a print job without holding it for direct printing, you can input a job on the wait screen to set the automatic inspection. | |
[Reference Image Automatic Deletion]*2 | Configure the setting to automatically delete the reference image created by automatic inspection. | |
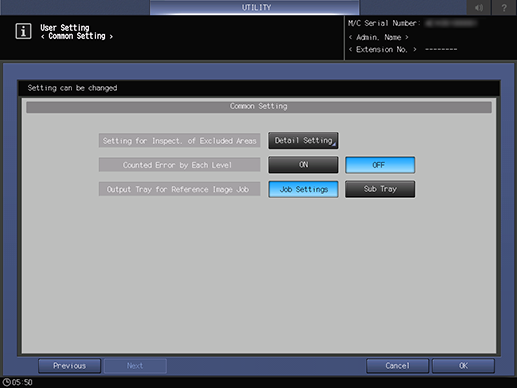
[Setting for Inspect. Of Excluded Areas]*2 | Set the default Inspection Excluding Area for automatic inspection. | |
[Counted Error by Each Level]*2 | Totalize the detected stains and omissions by level and display the result in the automatic inspection result report. | |
[Output Tray for Reference Image Job]*2 | Set the destination where to output a reference image job. When [Sub Tray] is selected, the following conditions must be satisfied.
| |
*1 All the following options are required to use this function.
Intelligent Quality Optimizer IQ-501
Video Interface Kit VI-512
*2 All the following options are required to use this function.
Intelligent Quality Optimizer IQ-501
Auto Inspection Unit UK-301
Relay Unit RU-702
Video Interface Kit VI-512
Video Interface Kit VI-513
*3 Paper cannot be output to the FoldingUnit FD-503, SaddleStitcher SD-506, and Secondary (sub) tray of Trimmer Unit TU-510. Paper cannot be output to the Secondary (sub) tray of Saddle Stitcher SD-513 in Multi Tri-Fold or Half-Fold mode.
Setting Procedure ([Select Chart Type (Auto Image Adj.)])
1
Press [Change].
2
Select the chart type used for each weight.
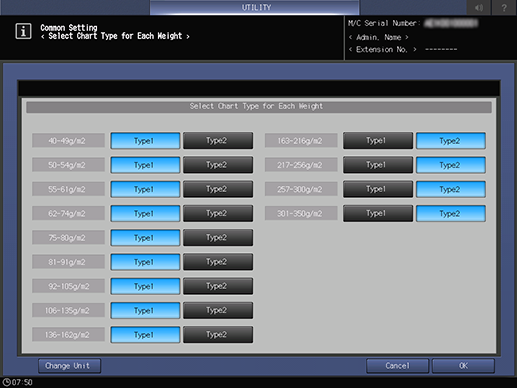
Each time [Change Unit] is pressed, the weight display unit is switched.
The crop mark printing position and length vary for each type.
Default:
162 g/m2 or less: [Type1]
163 g/m2 or more: [Type2]
3
Press [OK].
Setting Procedure ([Automatic Inspection Level Setting])
1
Press the key to select the inspection level to be adjusted.
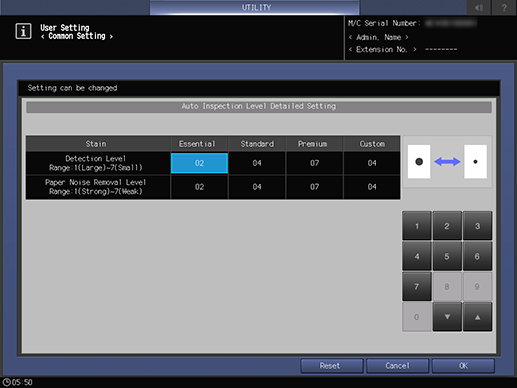
[Custom]: Sets the inspection level when [Custom] is selected.
2
Use the on-screen keypad to enter the adjustment value.
3
Press [OK].
The adjustable inspection level types are as follows.
Setting item | Description | |
|---|---|---|
[Detection Level] | Changes the stain size threshold. A higher level detects smaller stains. |  |
[Paper Noise Removal Level] | Changes the stain density threshold. A higher level detects thinner stains. |  |
 in the upper-right of a page, it turns into
  and is registered as a bookmark.